


Oriented strand board (OSB) has come a long way since its introduction in the 1970s. Use of OSB is now commonplace to integrate strength with durability for construction. From the most populated metropolitan areas to the most remote regions, builders count on OSB sheathing as sidewall, roofing, and flooring material. These wooden panels are proving to be far superior to initial expectations, establishing their sustainability time and again.
Strategic placement of these panels, supported by their structural frame, lends firmness to their bond, but proper installation is key. OSB must be installed correctly to maximize strength and durability. Unfortunately, some builders and framers fall into poor, hurried habits of improper installation. Below are some common mistakes we see in the field that are easily remedied.
USE OF A HAMMER TO CUT HOLES IN THE WALL FOR PLUMBING/ELECTRICAL LINES
This seems like a no-brainer, but it must be said: using a hammer to punch holes in your OSB sidewall material after installation will ruin the physics of construction. The force of the hammer loosens the bond between oriented strands, causing the wall to lose its durability and toughness. Punching too many holes through which to run electrical or plumbing ducts and wiring only weakens the OSB and reduces its performance. It’s better to pre-determine placement of holes for electrical design and cut with proper tools, such as saws and drills.
[rs-image img_url=”/wp-content/uploads/2019/10/Hammer-Roofing.png” link=”” alt=”” width=”800″ height=”” class=”” type=”primary” border=”default” new_win=”no” margin=”” pos=”pull-right” wrap=”yes”/]
IMPROPER HOUSEWRAP INSTALLATION
Housewrap ensures sheathing and siding remain protected from external, environmental factors. Improper installation of housewrap, however, leads to a plethora of problems. Install housewrap on dry OSB; otherwise, you may lock in moisture and welcome black mold to your project. Do not leave any seams unsealed. Every flake of OSB should be covered, and all edges should be properly sealed. Install housewrap horizontally, not vertically. Tuck the housewrap behind the windows, and use proper window flashing to avoid OSB exposure.
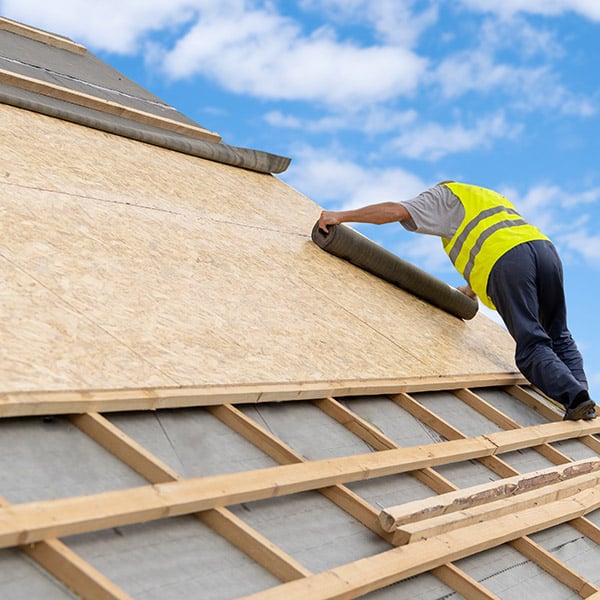
ADDING FELT AND SHINGLES TO WET DECK AFTER A RAINSTORM
Rain leaves the deck exposed and wet. Do not black out the roof right after a rainstorm, as your OSB needs time to dry. Covering OSB before it dries out entirely leaves the wood vulnerable to decay and damage. Be patient. It is better to wait for the OSB to dry out than deal with the inevitable mold and possible re-build if roof panels are covered while wet.
IMPROPER FLASHING OF DOORS AND WINDOWS
While the rest of a house’s sidewall and roof remain protected through housewrap, doors and windows are left exposed due to open edges. Proper flashing of the windows and doors is vitally important to drain accumulated water outwards, rather than draining it down and in. It’s worth saying again: do not use housewrap as an alternative to proper window and door flashing.
(Below) Over-nailing panels
[rs-image img_url=”/wp-content/uploads/2019/10/Over-nailing.jpg” link=”” alt=”” width=”200″ height=”” class=”” type=”primary” border=”default” new_win=”no” margin=”” pos=”pull-right” wrap=”yes”/]
NOT ALLOWING PROPER SPACING TO ALLOW FOR PANEL EXPANSION
When installing OSB, always maintain a 1/8” space between the panels to allow for expansion. It is natural for wood to swell and diminish as it adjusts to its environment (e.g., humidity, rain, moisture). If panels are jammed tightly together, the OSB does not have space to “breathe” and the panels may buckle.
CONSTRUCTION OF BALCONIES HIGHER THAN THE DOOR THRESHOLD
A house’s balcony rising higher than the door threshold gives way to water dripping on the OSB panel of the home’s sidewall and floor. This is an easy mistake to fix: simply ensure the balcony is set at least up to the door threshold, if not lower.
HELPFUL HINTS FOR PROPER OSB INSTALLATION
- Keep a 1/8″ gap spacing between the roof panels and wall. We said it earlier, but it is worth repeating. Builders must allow ample space for OSB expansion and avoid buckling.
- Let panels dry before adding roof decking or siding. Water does the most damage to OSB. Let panels dry entirely before adding the decking or siding.
- Know where to nail. When installing sheathing, make sure to nail at a minimum of 10mm distance from the edges. It helps avoid any splitting, thus not interfering with the structural integrity. Always follow specific instructions provided by your OSB manufacturer.
Changing bad habits is never easy, but getting the desired result from proper install makes it worth-while. Get set to experience long-lasting, durable sidewalls and, best of all, no complaints from customers with proper OSB installation.
—Zach Zimmerman, Sales Representative